Baked Blueberry-Banana Oatmeal Cups

I know they say that breakfast is the most important meal of the day. However, as some studies have shown, it only has a minimal impact on metabolism and weight loss. I like this article from HuffPost. Then there’s the case of Intermittent Fasting (IF) that’s all the craze with Crossfitters and a lot of people who follow the Paleo/Primal diet. I tried Primal for a while. Not for me. I love my bread, cakes and pastries too damn much!

I was always a big breakfast (not McDonald’s) eater, until I realised I wasn’t all that hungry. What I mistook for hunger was actually just thirst from all those hours I was fast asleep, dehydrated. However, as my weight has once again dropped to a little below my ideal, I decided that I would slowly increase my calorie intake – and that means eating a small breakfast.

In the past, my day usually started with a big bowl of oatmeal, a habit I started in junior college when I started becoming a little more conscious about my weight (there were many skinny girls around where I came from). Cooked stovetop – piping hot, topped with a generous dollop of peanut butter, a sliced banana/other fruits and a sprinkle of cinnamon. I went to bed looking forward to my oatmeal breakfast. I never understood how people could detest oatmeal. I guess they simply don’t know how to cook a mean porridge!

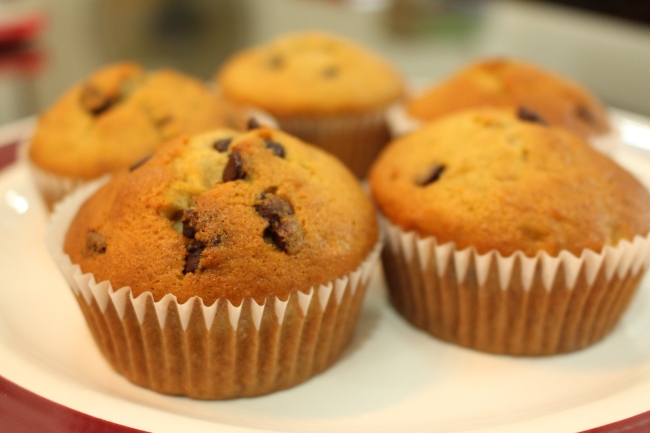
Here are some of my previous oatmeal breakfasts for inspiration.

tumblr_nm3zn5eED31r59aavo1_540  tumblr_nm3zpwtRLP1r59aavo1_540 Processed with VSCOcam with c1 preset

You see. Oatmeal can look pretty darn good. It’s all about taking a little extra effort to jazz up the “baby food”.

I did this for years, until I discovered overnight oats. It was heaven, like having dessert for breakfast. Cold, creamy and sometimes very colourful – it was a joy to eat!

tumblr_nm3zojaUf21r59aavo1_540

My favourite way of having overnight oats requires no recipe at all – simply fill a jar/container with rolled oats, pour in the milk of your choice until the oatmeal is just covered, then top with a tablespoon or two of yogurt to make it creamy. The next morning, slice some fruits, mix the oats well and enjoy! I love using red dragonfruit because of its colour (it’s always fun eating pink food), and it is also chock full of fibre which helps me cleanse my system. Warning – eat too much and expect your poop to turn red too.

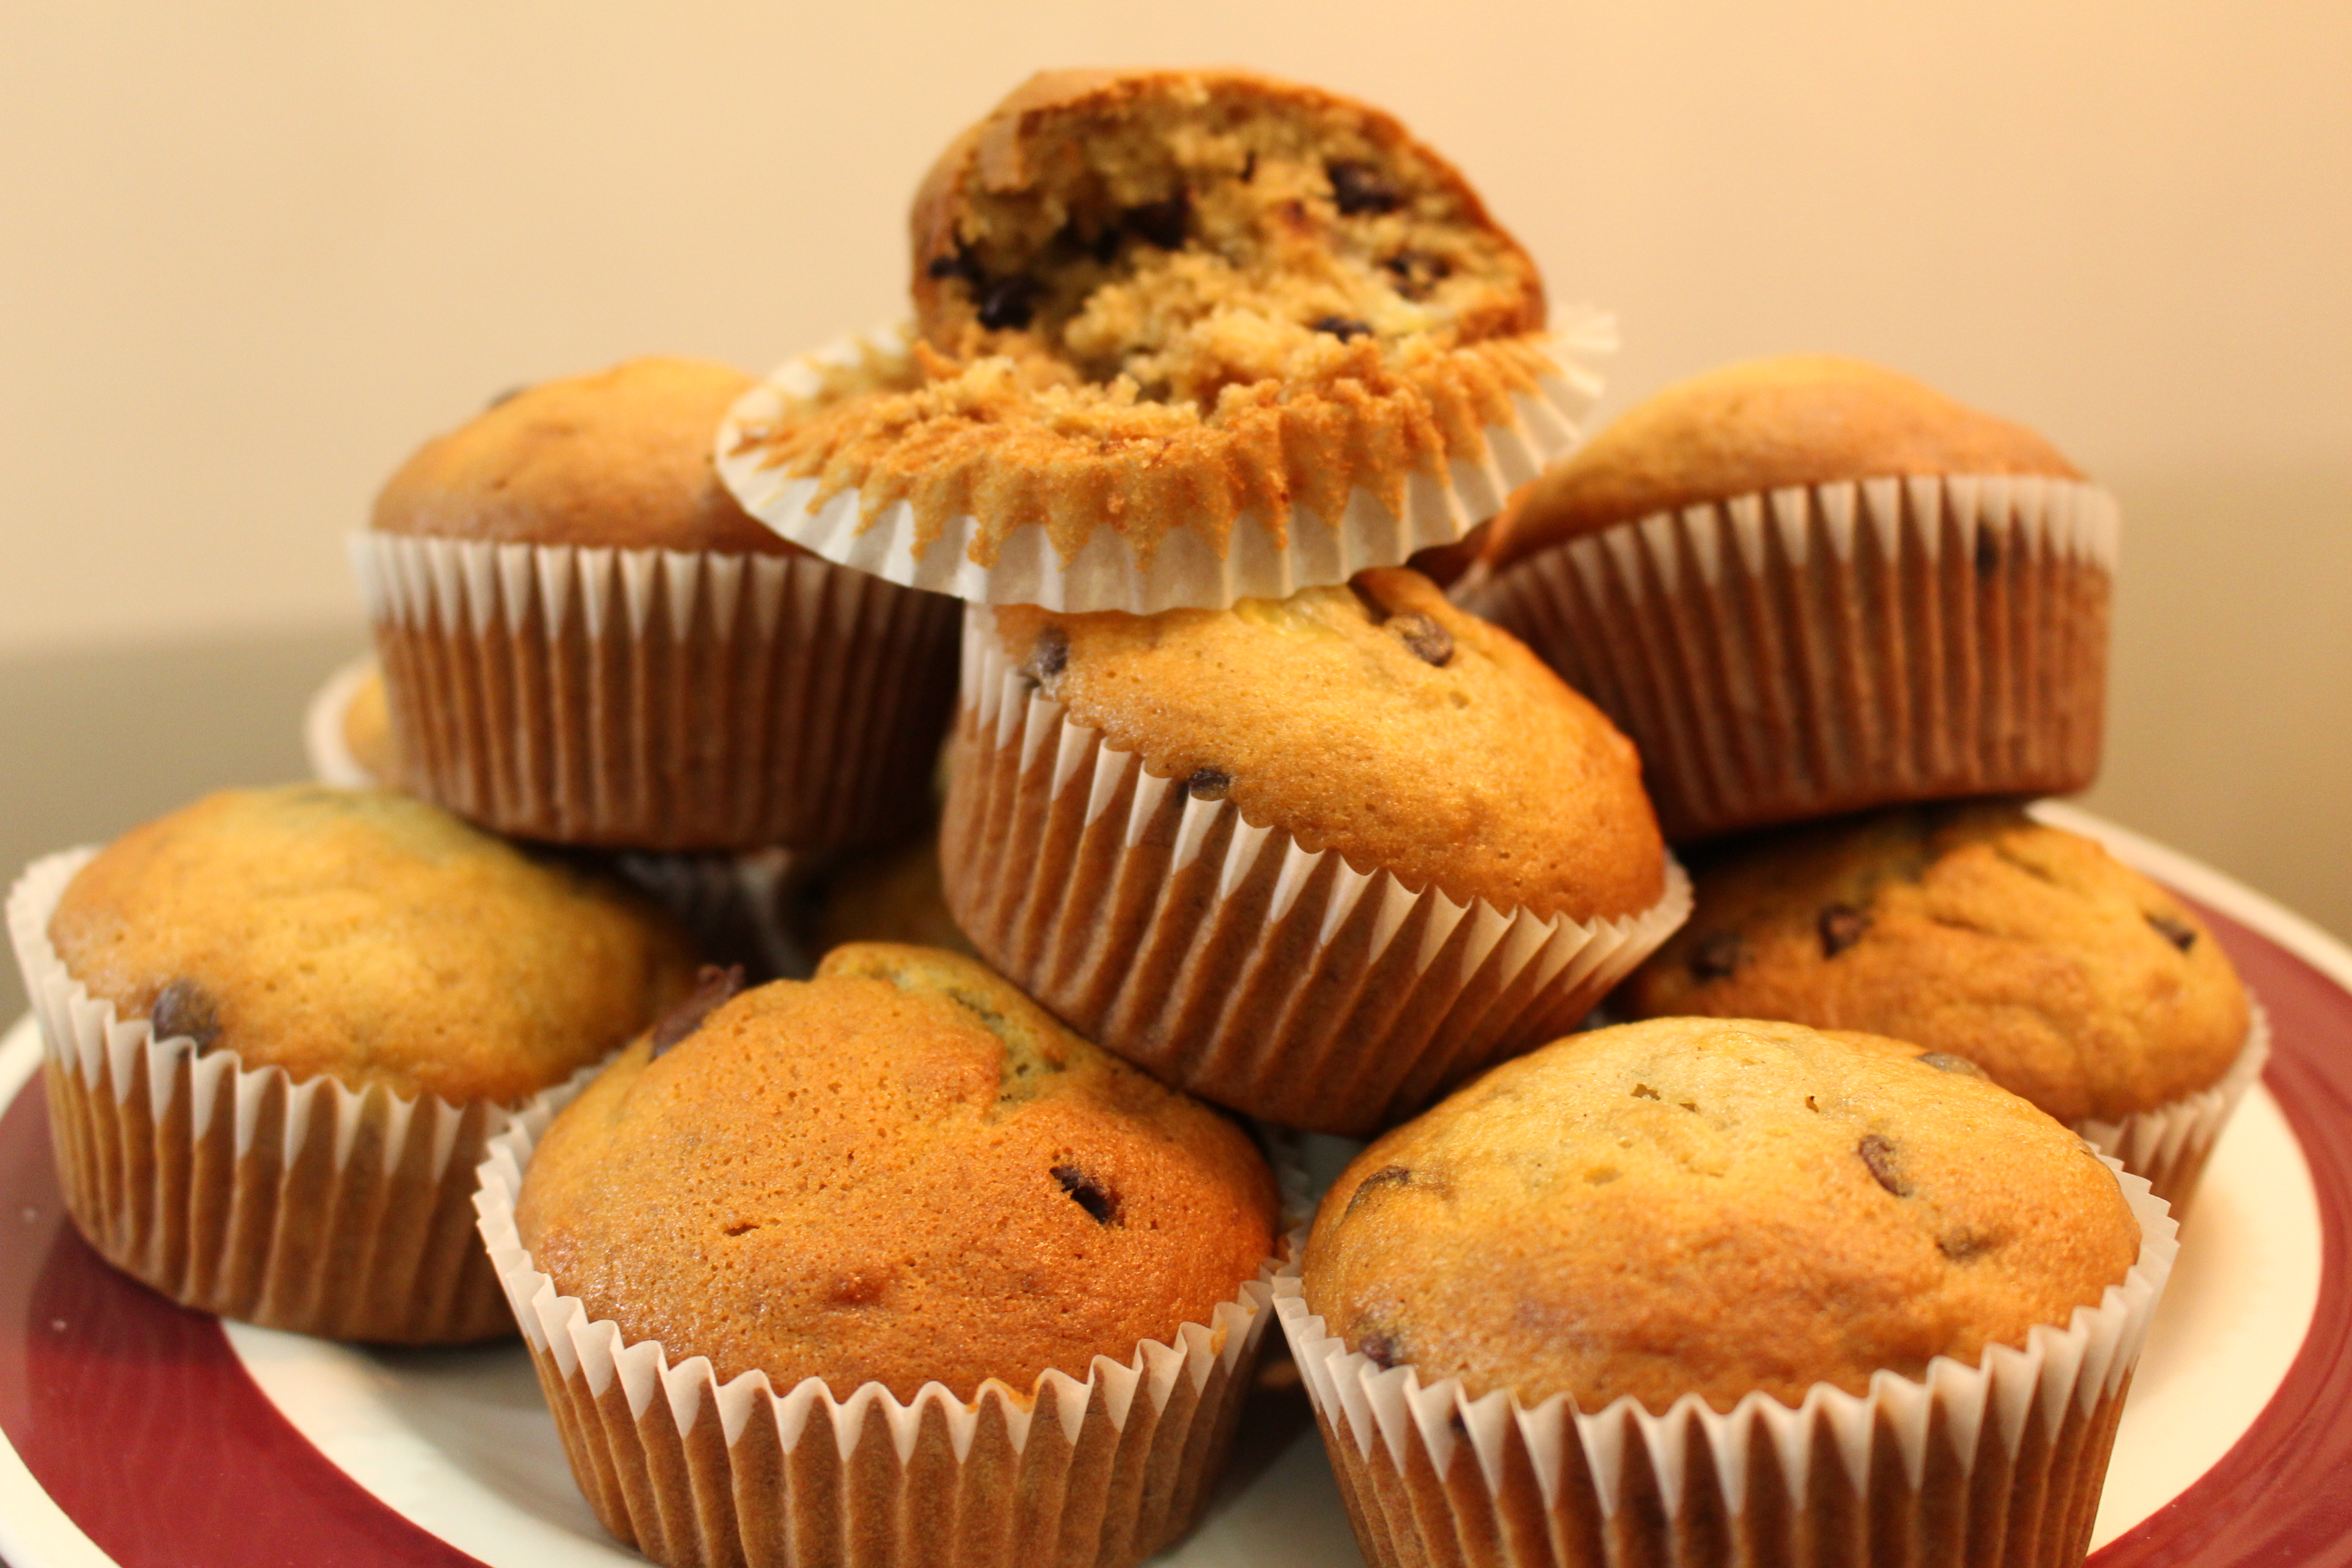
While overnight oats is probably still my favourite way of eating oatmeal, I recently made my first baked oatmeal, and it comes darn pretty close. Plus, it’s as convenient as overnight oats. Simply bake it over the weekend, and you’ve got a whole weeks’ worth of breakfast (and snacks) settled!

I tried to make mine as healthy as possible, so I decided to eliminate any processed sugars; I used just a little bit of honey to sweeten. Plus, the overripe bananas add to the sweetness already!

Processed with VSCOcam with s2 preset

Recipe: 3’B’ (Baked Blueberry-Banana) Oatmeal Cups

Makes about 16 cups

  • 2 large ripe bananas, mashed
  • 2 eggs
  • 2 tbsp honey (or more if you prefer something sweeter)
  • 2 cups milk
  • 3/4 tsp vanilla extract
  • 1/2 tsp salt
  • 3/4 tsp baking powder
  • 2 1/2 cups rolled oats or quick oats
  • 1/4 cup walnut meal (or any other kind of nut meal) – optional
  • 1/4 cup walnuts to top – optional
  • 1 cup blueberries
  1. Preheat oven to 375 degrees Fahrenheit/190 degrees Celsius. Line muffin tin with cupcake liners.
  2. Mash bananas in a large bowl.
  3. Add eggs, honey, vanilla extract, salt and baking powder into bowl with mashed banana and whisk to combine.
  4. Add the milk and mix well.
  5. Stir in oatmeal and walnut meal.
  6. Stir in blueberries, leaving some to top the cups.
  7. Fill each cup until almost full – slightly over 3/4 of the way.
  8. Top with extra blueberries and walnuts.
  9. Bake for 25 minutes or until the top is golden brown (the tops should not be wet to the touch).
  10. Leave to cool on a wire rack before refrigerating, or have some right away!

That’s it! Easy peasy.

Notes: The oatmeal cups can be refrigerated – simply reheat in the microwave for 30 seconds to get them warm again.

I hope you enjoy this as much as I did!

Baked Blueberry-Banana Oatmeal Cups

Vienna, Austria (Part 2)

My second time in Vienna was a trip with Peiwen and Alex. Alex and his mum warmly welcomed us into their beautiful home to stay for two days.

We were there to see the famous Christkindlmarkt. From about mid November, many squares transform into festive Christmas markets. Yes, Christmas is a BIG thing in Austria, and all around Europe. Out of all the Christmas markets in Vienna, the main one, and by far, the most beautiful and grandest Christmas market I’ve seen, is the one at Rathausplatz (City Hall Square). It is on the top 10 lists of many of the best Christmas markets in Europe. For the locations of the Christmas markets in Vienna, click HERE.

All around town, the streets were adorned with Christmas lights, decorations and Christmas trees. It was really stunning at night.

IMG_4801

IMG_4807

IMG_4812

Beautiful street lights around the Historic Center of Vienna

If only Christmas was like this in Singapore! But it would be extremely expensive!

On the first night, we visited the Christkindlmarkt at Rathausplatz.

IMG_4817

Christkindlmarkt at Rathausplatz

At this Christkindlmarkt, you will find over 150 stalls selling everything Christmassy. What makes it different is its setting, in the foreground of the Rathaus (City Hall), a beautiful and imposing Neo-Gothic building. Then there are the myriad of coloured lights that illuminate the market. Because I suck at night photography, I don’t think I managed to capture the beauty and ambience of the Christmas market. It is definitely a must-do when you’re in Vienna during Advent, even if you don’t celebrate Christmas. Vienna might convert you!

IMG_4842

Lebkuchenherzen

IMG_4844

IMG_4859

Christmas ornaments

Of course, there is a lot of food available at the Christkindlmarkt. I was very attracted (as usual) to the sweet stuff and glühwein (mulled wine). The cakes and sweet treats were so beautifully made.

IMG_4863

Christmas chocolates

IMG_4851

Austrian specialties – Sacher, Mozart & Apfelstrudel 

IMG_4858

Christmas-themed soap

IMG_4873

Das Wiener Rathaus (City Hall)

IMG_4876

Christmas lamps

We bought a slice of chocolate cake and a huge Krapfen (a.k.a a doughnut, or Berliner) for breakfast the next day. Peiwen and I also got a cup of mulled wine each, and walked back to Alex’s place slowly sipping (and spilling) the wine. How it works at Christmas markets is that you pay for the drinks with the price of the cup included. It is not a plastic cup, or any old cup, but a special one with drawings and little pictures that are 3D. When, and if you return the cup, you get a few Euros back. If you don’t, then you simply keep the cup. So yes, I did not steal the cup. It is a nice souvenir!

The next day, we visited Schloß SchönbrunnI didn’t manage to visit the palace the last time I was in Vienna with Cindy, so my two friends happily (or reluctantly) agreed to follow me. We just visited the garden, because apparently, just seeing the palace building and the garden alone is good enough.

IMG_4888

IMG_4894

Christmas market at Schönbrunn

IMG_4900

IMG_4903

Initially constructed as a palatial hunting lodge by the Habsburgs, the palace was later used by the courts under Maria Theresia.

The name Schönbrunn means “beautiful well” – the well referring to a well where the courts got their water. The word schön was one of the first German words I learnt. Schönen Tag (good day), people! In 1918, with the fall of the Habsburg Monarchy, ownership of Schönbrunn Palace was transferred to the newly founded Republic of Austria.

IMG_4911

Alex is smiling!

We walked up the hill, through the gardens and caught an amazing view of Vienna from high up.

IMG_4920

The Gloriette

 I had to Google the meaning of gloriette – “A gloriette is a building in a garden erected on a site that is elevated with respect to the surroundings”.

IMG_4927

After Schönbrunn, we made our way back to town to get lunch. I think Alex was famished! We had a buffet lunch at some restaurant before heading back home to take a break. We considered going to the opera, but decided against it since no one was really too fond of it. Instead, we went out to get some veal to cook ourselves dinner. We were going to cook a typical Viennese dish – Wiener Schnitzel!

Alex’s Oma (grandma) gave him the recipe, so we set out to get the ingredients – some flour, meat, and lard to cook. I didn’t even know they sold that lard like that. It was packaged like butter and looked like petroleum jelly. Anyway, I did most of the cooking. 😛

I think it is an extremely easy recipe. There really isn’t any way to go wrong, unless you burn it. I thought this recipe was as close as it could get: Wiener Schnitzel recipe.

We cooked some rice to go, and garnished with it with lemon. It was really simple, yet delicious. Am I a fan of Wiener Schnitzel though? I don’t care much for it, but I would eat it if someone served it (I guess).

IMG_4933

IMG_4940

Our homemade Wiener Schnitzel

Thank you to Alex and his mum for making us feel so at home in Vienna!

IMG_4945

Really awesome chocolate from Alex’s mum as our farewell gift

The three of us returned to Graz after our short trip together.

Back to school! On the train ride back, I was working hard on my German homework and studying hard for my exam. Fortunately, I had two German speakers to help me 🙂

Vienna, Austria (Part 2)

Paula Deen’s Cinnamon Rolls

Cinnamon rolls are a perpetual craving of mine. There’s just something about the sweet smell of cinnamon. Of course, there are many uses for this spice, from blood sugar control to digestive aid. However, I’m sure most would agree that its marriage with sugar, all rolled up in a yeasty dough, is its greatest gift to humanity.

This was my very first attempt at baking yeast bread, so there is definitely a lot of room for improvement. I loved watching the dough rise; there was just so much joy in the anticipation!

I used Paula Deen’s recipe for these wonderful cinnamon rolls. Recipe can be found here. Thank you, Paula Deen!

I cut the recipe in half because lousy planning = insufficient flour and butter.

IMG_8676

IMG_8712

IMG_8716

IMG_8721

IMG_8730

Give baking bread a try. It ain’t as tough as it seems! 🙂

Paula Deen’s Cinnamon Rolls

Recipe: Banana Brownie Muffins

Last night, as I attempted to make my first ever overnight oats in a jar, I peeled the skin off the overripe banana, only to find that it was way too brown and mushy to be palatable. The perfect reason for baking with bananas.Image

Plain ol’ banana muffins are great for any occasion, but chocolate + banana? Heaven! It’s one of the yummiest flavour combinations, just like peanut butter and chocolate, peanut butter and jelly, maple syrup and bacon… Have you tried a Nutella + peanut butter + banana grilled sandwich before? It used to be my treat back when I didn’t give a hoot about my weight!

 I made a chocolate banana brownie years ago, and I got lots of praise for it when I brought it to the office. This time, I thought a chocolate banana brownie muffin would be perfect!

Banana Brownie Muffins

Adapted from: Food Equals Happy Me

Ingredients:

180g salted butter (unsalted is fine)

1/2 cup light brown sugar

1/2 cup white granulated sugar

1 tsp vanilla extract

3 eggs

2 overripe bananas, mashed

1 1/3 cup plain flour

3/4 cup cocoa powder

1/4 tsp baking powder

Preheat oven to 170 degrees Celsius.

Firstly, add butter, sugar and vanilla extract into a large mixing bowl. Using an electric mixer, beat until creamy and no more lumps of butter remain.

ImageNext, add eggs one at a time, and continue beating after each addition. Once the mixture is smooth, add the mashed bananas. ImageFold the banana into the batter until well combined.ImageThen add sifted flour, cocoa powder and baking powder and fold until well combined.ImageSpoon the batter into cupcake holders, or simply use a baking pan that you’d use for a brownie. Pop into preheated  oven.ImageImageRemove muffins/brownies from the oven, about 20 minutes, or until a toothpick inserted in the middle of the muffins come out clean. Alternatively, if you want them fudgier, 15 minutes might do the trick!

IMG_2611_1ImageLook at how moist these muffins are! The bananas make them really moist.ImageImageImageImageA really easy, one bowl recipe that’s quick to whip up. Sure to satisfy your chocolate cravings! I’m really satisfied with this recipe 🙂

ImageThe disaster that happened when folding in the cocoa powder.

P.S. Remember to lick the bowl clean. It’s one of the yummiest batters I’ve ever tasted.

Recipe: Banana Brownie Muffins

Recipe: Double Chocolate Fudge Brownies

I was invited for a potluck yesterday and was deciding what to bring. I’d already decided on baked chicken, and I almost made cornbread muffins to go, thinking I could go all Kenny Rogers-style. To my horror, I found insects in my cornmeal! So I decided to make dessert instead. And to be safe, something chocolatey. You can’t go wrong with chocolate.

I have been using Martha Stewart’s brownie recipe for a long time and decided to try something new instead. I chanced upon Alice Medrich’s brownie recipe a while back and it has been on my to-bake list. Here’s my own adaptation of the recipe:

Double Chocolate Fudge Brownies

Adapted from Alice Medrich’s Best Cocoa Brownies


Ingredients:

10 tablespoons salted butter

1 cup granulated sugar

3/4 cup plus 2 tablespoons unsweetened cocoa powder

1 teaspoon pure vanilla extract

2 eggs

1/2 cup all purpose flour

1/4 cup chocolate chips

1/4 chopped almonds

Preheat oven to 175 degrees Celsius.

In a large glass or metal bowl, combine the butter, sugar and cocoa powder.ImagePlace the bowl over a pot of simmering water and stir until butter melts and combines with the sugar and cocoa.ImageHere’s when I panicked. Usually, when I make brownies, the mixture is ganache-like, but this time it was a paste! I tasted the paste and it was grainy because the sugar crystals did not melt. But it tasted soooo good! So don’t panic! When it looks like this, remove the bowl from the heat and allow to cool until warm to touch.ImageNext, stir in the vanilla extract, followed by the eggs. You don’t want the eggs to cook so stir quickly with a whisk or a wooden spatula. After the addition of the eggs, the mixture should look shiny, like a ganache frosting.ImageWhen well combined, add the sifted flour and mix until no streaks of flour remain. Here’s the interesting bit: the instructions ask to beat the batter for 40 strokes.

I added the chocolate chips and chopped nuts as an afterthought and stirred until just combined. ImageSpread the batter evenly in a prepared baking pan. The batter was thick and hard to spread, but be patient. A spatula should do the job. I used a 8″ x 8″ baking pan and I didn’t oil/flour-dust or use any parchment paper or baking foil because I forgot. But please do. It’s much easier to remove and to slice afterwards. Bake for 20 minutes, or until a toothpick comes out clean. Alternatively, if you like your brownies fudgier or a little under-cooked, 18 minutes should be good.

The result: A perfectly crackly top brownie.ImageImageAs you can see, I used a fork to remove the brownies out of the pan, making sure not to scratch my baking pan. So please, use parchment paper or foil. The sides are especially pesky because they tend to be more harder and stick to the pan.ImageImageImageImageImageImageImageDense. Fudgy. Nutty. Moist. Chocolatey. I’m sold. If you’re a chocolate lover, then this is the recipe for you. Reminiscent of my Tunnel of Fudge Cake, it’s like the fudge centre of the cake (the best part)!

Best eaten warm, we heated the brownies up in the microwave for about 30 seconds and had them with ice cream from Island Creamery. Sinful, but totally worth it!

Recipe: Double Chocolate Fudge Brownies

Recipe: Tunnel of Fudge Cake

The infamous Tunnel of Fudge Cake is a family favourite. My mum loves this cake so much so that she declared it her favourite cake. Although I must prefer my mum’s carrot cake with cream cheese frosting – which as of today, I have never found one that beats hers – I’d say that this is my second favourite cake!

Best eaten fresh out of the oven, or warmed, with a dollop of ice cream. This cake is sheer heaven for chocolate lovers like me!

IMG_0941

IMG_0967

IMG_0971

The recipe is from Pillsbury. You can get it here: http://www.pillsbury.com/recipes/tunnel-of-fudge-cake/8d3b4927-2f71-41a3-9dab-7750f045f252

The only difference is that we make an almond glaze as well.

I topped my warm slice of cake with Häagen-Dazs Macadamia Nut ice cream, but I think this cake would go great with coffee, vanilla, chocolate, salted caramel… Ok, who are we kidding. It probably goes well with everything.

Two words. Molten goodness.

Love,
Maddie

Recipe: Tunnel of Fudge Cake

Recipe: Chocolate Chip Banana Muffins

I think I just found the perfect banana bread recipe. I’ve baked banana bread many times before, but I’ve never been satisfied with them. This is my criteria for the perfect banana bread:

1) Taste

2) Moist

3) Able to see the oh-so elusive brown flecks of banana

4) Not too dense

This recipe pretty much satisfies all of my must-haves. I had 2 right away. I don’t think I need dinner anymore!

I initially planned to bake banana blueberry muffins but I realised that I only had a measly handful of blueberries left after breakfast. So I threw in some chocolate chips that I had in the fridge at the very last minute. Without further ado, here’s the recipe for my chocolate chip banana muffins.

Ingredients:

1 2/3 all purpose flour

1 tsp baking soda

1/4 tsp cinnamon

1/2 tsp salt

1 cup white sugar

2 eggs

1/2 cup vegetable oil (or any neutral oil)

3 ripe bananas

2 tbsp Greek yogurt

1 tsp vanilla extract

3/4 cup chocolate chips

Preheat oven to 180 degrees Celsius.

Start by sifting flour, baking soda and cinnamon into a large mixing bowl. Add salt.

ImageImage

In a separate bowl, add sugar and eggs and whisky until light and smooth. The colour of the mixture should be a pale yellow.Image

Image

Mash bananas with a potato masher or a fork. The mash goes into the wet mixture, together with the yogurt, oil and vanilla extract. I used Greek style natural yogurt.ImageImageImageImageImage

Stir wet mixture until combined. Fold in wet mixture with the dry ingredients.

ImageImageImage

Finally, fold in chocolate chips.

ImageImageImage

Fill cupcake liner to 3/4 full. I usually fill a little more if baking muffins because I like my muffins big and beautiful 😀

Now here’s the problem, I didn’t time how long it took to bake them. Keep an eye on them. I’d say about 15 minutes or so would be about right. They should be golden brown. You smell them first, so once you do, be ready in a few minutes to get them out.ImageImageImageImageImageImageImageI hope you love these muffins as much as I do. Feel free to bake a loaf instead of muffins. I’m planning to give them out, so it’s much easier to do with muffins, and a whole lot less messy too.

Till next time! Ciao.

Recipe: Chocolate Chip Banana Muffins

Orange-cranberry scones… And a new camera!

Seems like a school cafe may be happening in the new future. I’m really excited! Can’t wait to develop the menu and get creative. I know it’s hard for the more health-conscious students in SMU to find nutritious, clean meals, so we will definitely incorporate that into the menu. But of course, THERE WILL BE DESSERT. My favourite.

Had some time on my hands, so I decided to try out something new. I have never made scones before, so here’s my maiden attempt. All photos taken on my spanking new Canon EOS 700D!

Orange Cranberry Scones – Makes 6

Ingredients:

1 cup self-raising flour (or do as I did: 1 cup all purpose flour + 1 1/4 tsp baking powder + 1/4 tsp salt), plus more for dusting

50g butter, cold (I used salted)

1 tbsp white sugar or caster sugar

1 tsp orange zest

Dried/fresh cranberries or any other berries

1/4 cup orange juice, freshly squeezed

1/8 cup fresh milk

Jam, clotted cream, kaya, Nutella, or anything you wish, to serve

Preheat oven to 200 degrees Celsius.

Start by sifting flour – baking powder and salt if making your own self-raising flour, into a bowl. Cut chilled butter into cubes and rub in with fingers until the resulting mixture looks like fine crumbs.

Image

Image

 Add sugar and orange zest and combine. I only decided to make these with cranberries at the last minute. You should probably add the cranberries in now!

Image

Make a well in the middle of the combined mixture, and add in the orange juice and milk. Use a spoon to combine, until you get a dough. My dough was too sticky, so keep some additional flour nearby and add until you get the right texture.

Image

Image

Image

Knead the dough on a lightly floured surface. My tip here is to flour your hands before kneading, just in case the dough is too sticky and sticks to your hands too. What a mess!

Image

With a rolling pin, roll the dough to about 2cm thick and use a cookie cutter or, like me, a glass, to shape the scones. Image

In the oven they go! (If you want shiny tops, use an egg wash!)

Bake for 20 minutes, or until scones are golden on top.ImageImage

ImageImageImageImageI made my scones mini, but feel free to cut them bigger or thicker. Not the most kick ass scones in the world, but I like the texture of it. Not too cakey, a little dry and more like a biscuit with its crusty exterior. I ate mine with bitter marmalade, but my mum always insists on clotted cream with jam. An easy-peasy recipe. Go ahead, give it a go!

Orange-cranberry scones… And a new camera!